Overview
A load balancer can listen for and distribute traffic across multiple instances in a region. You can create this using either the OpenStack API or the Cloud Control Panel at https://cloud.ramnode.com.
High Availability
Automatic failover
Health Monitoring
Monitor backend health
Multiple Algorithms
Round robin, least connections
Create Load Balancer
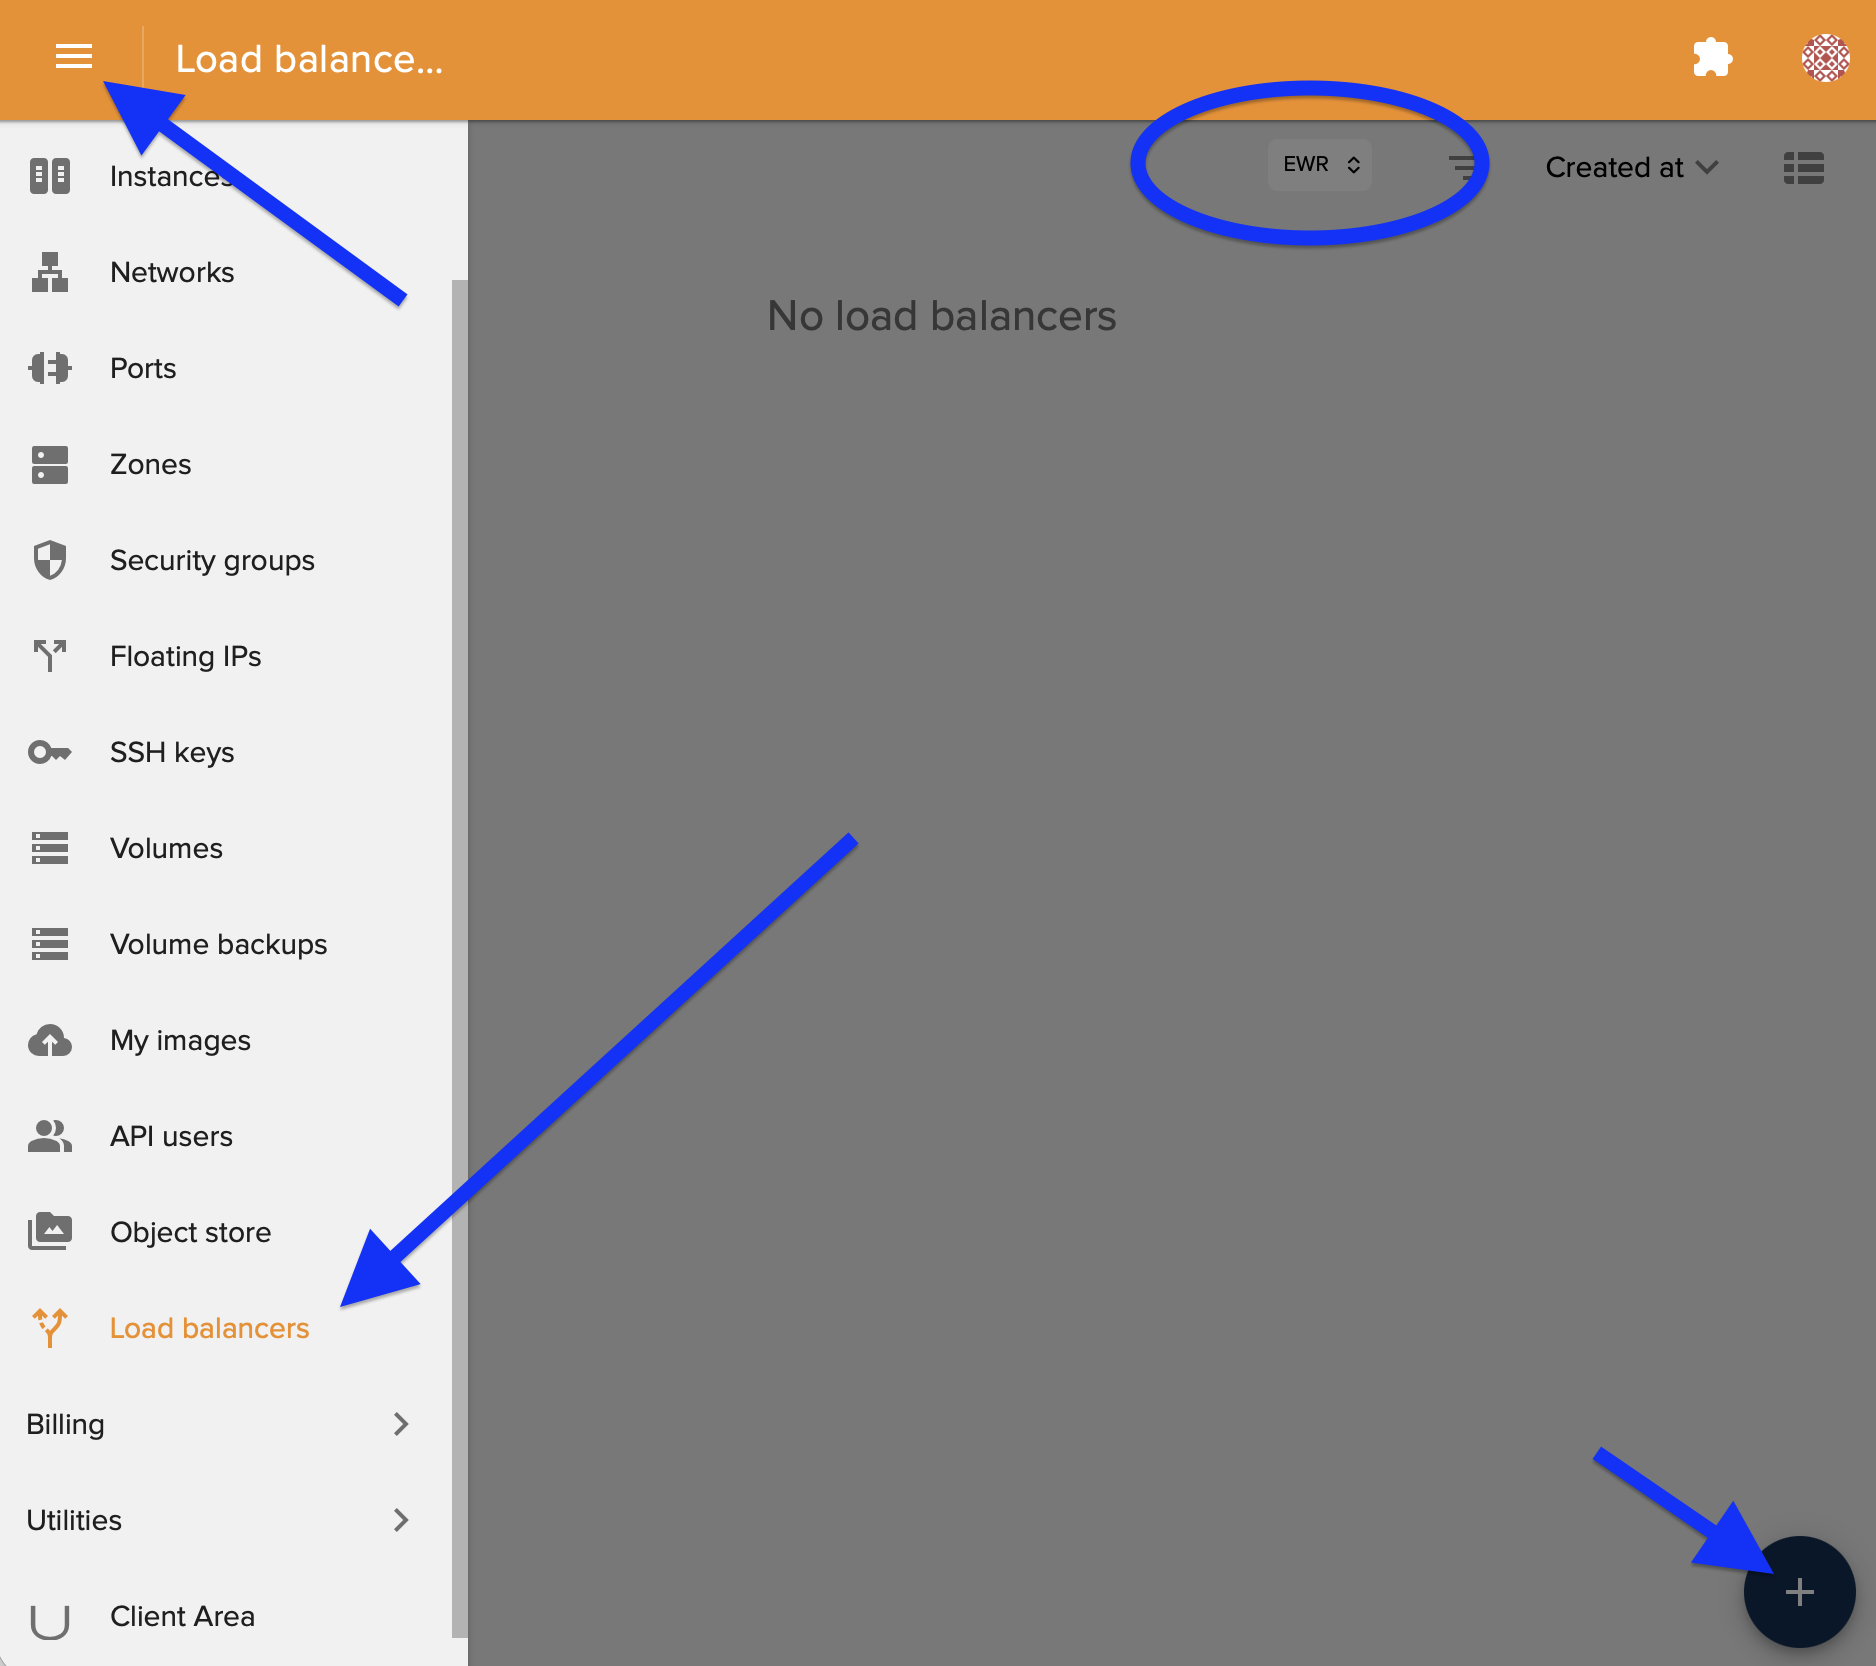
Navigate to the Load Balancers section in the Cloud Control Panel and click to create a new load balancer.
⚠️ Important: Make sure to select the correct region! Your load balancer must be in the same region as your backend instances.
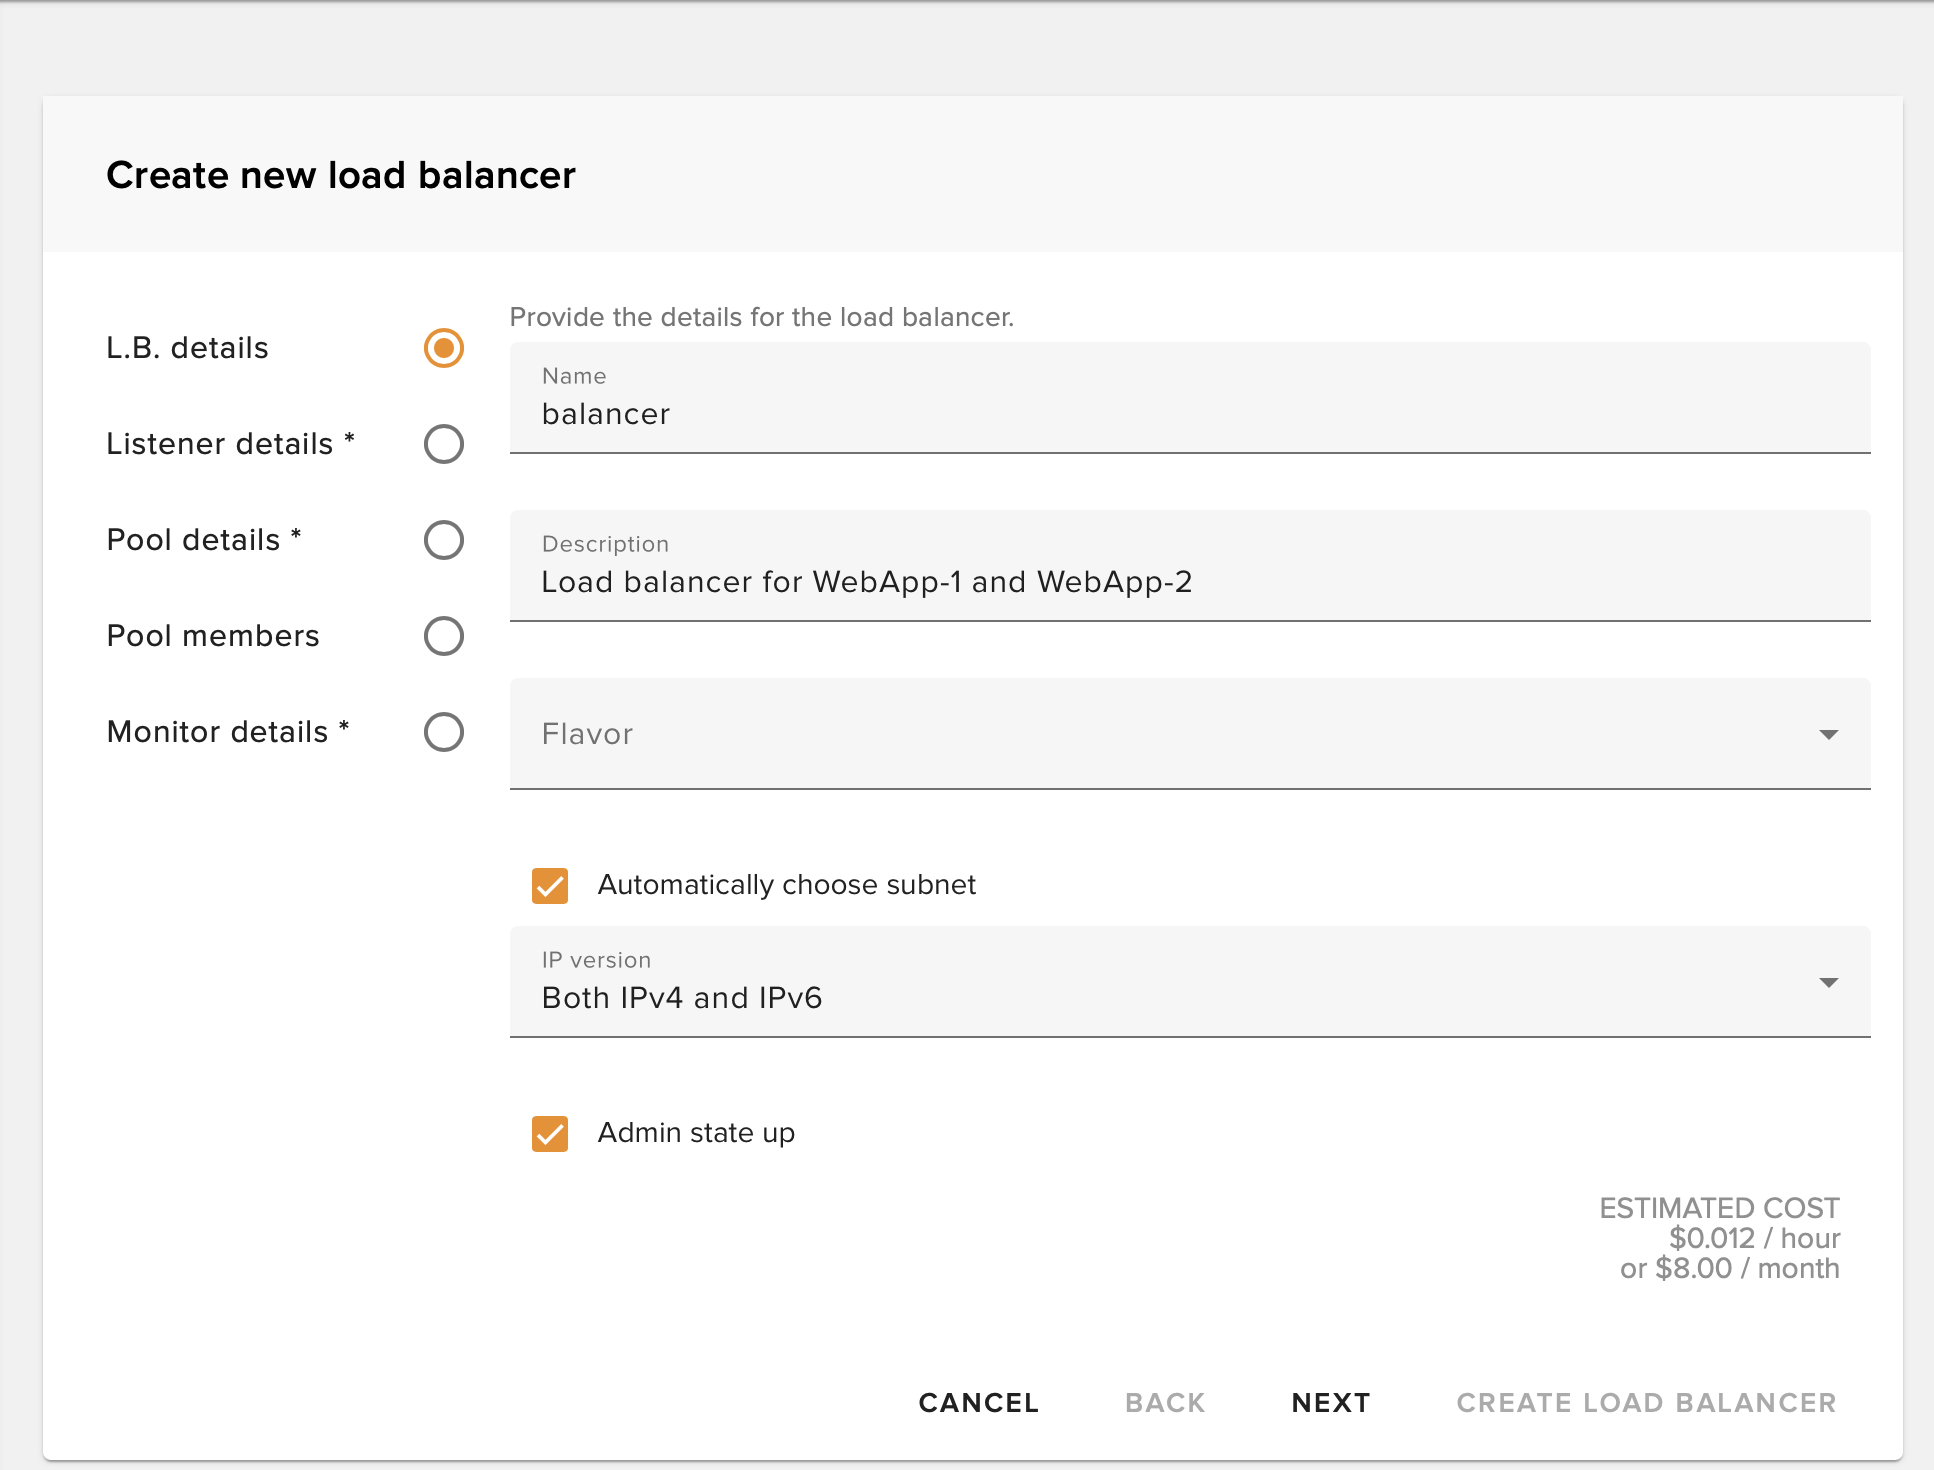
Name Your Load Balancer
Enter a descriptive name for your load balancer to easily identify it later.
Configure Listener
Set the protocol and port on which your balancer will listen from the public Internet.
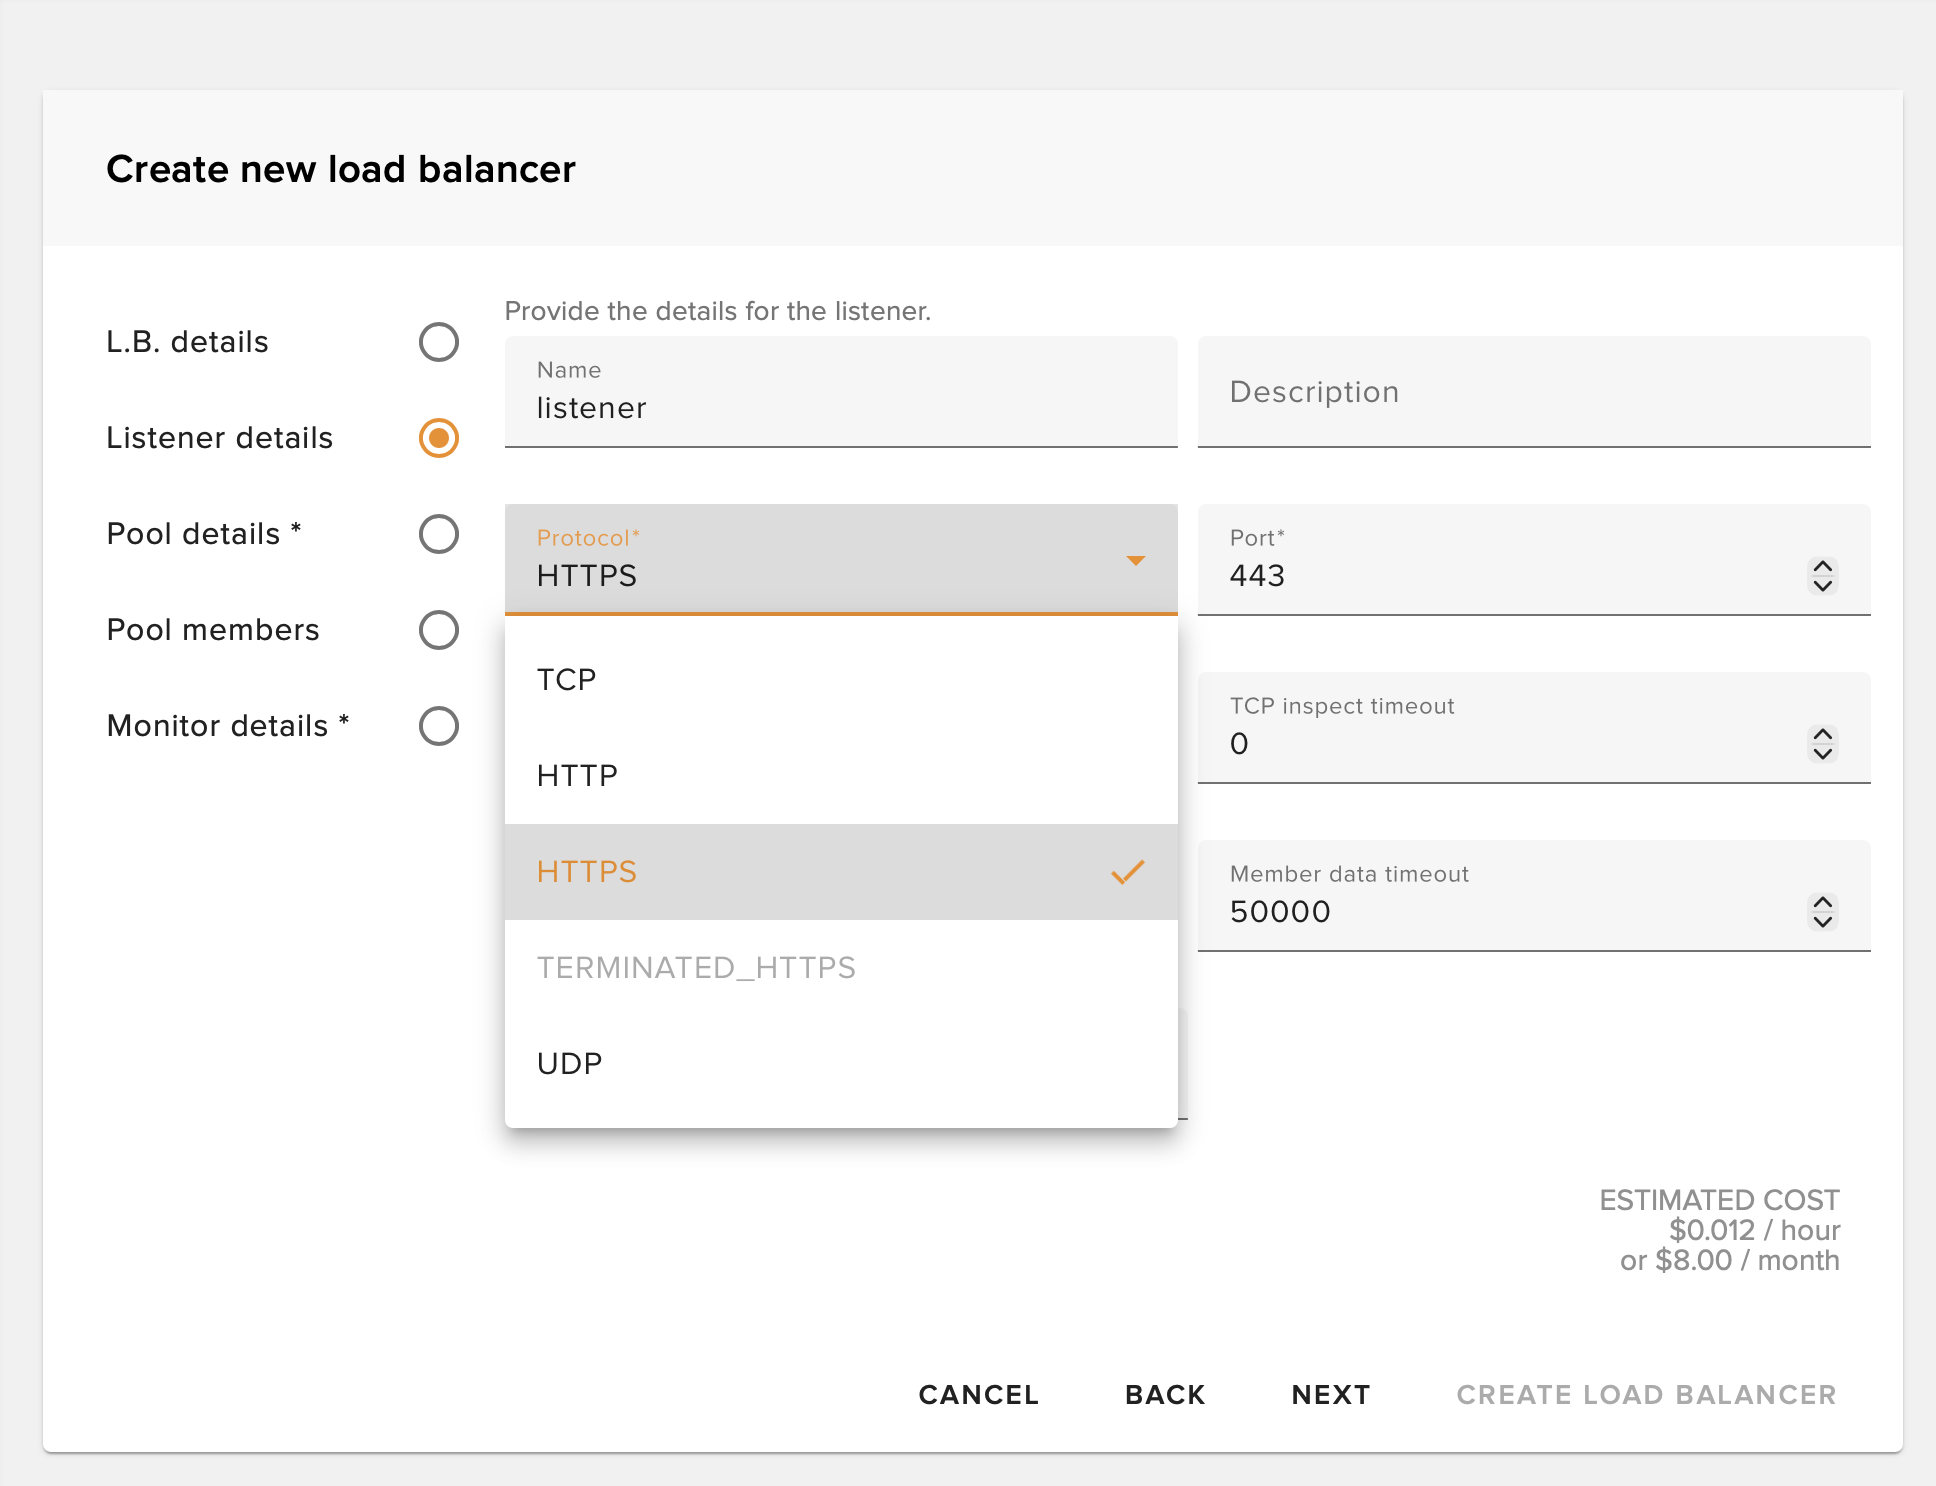
💡 Tip: Common configurations include HTTP (port 80), HTTPS (port 443), or TCP for custom applications.
Set Pool Algorithm
Set the algorithm by which the load balancer will distribute traffic to members.
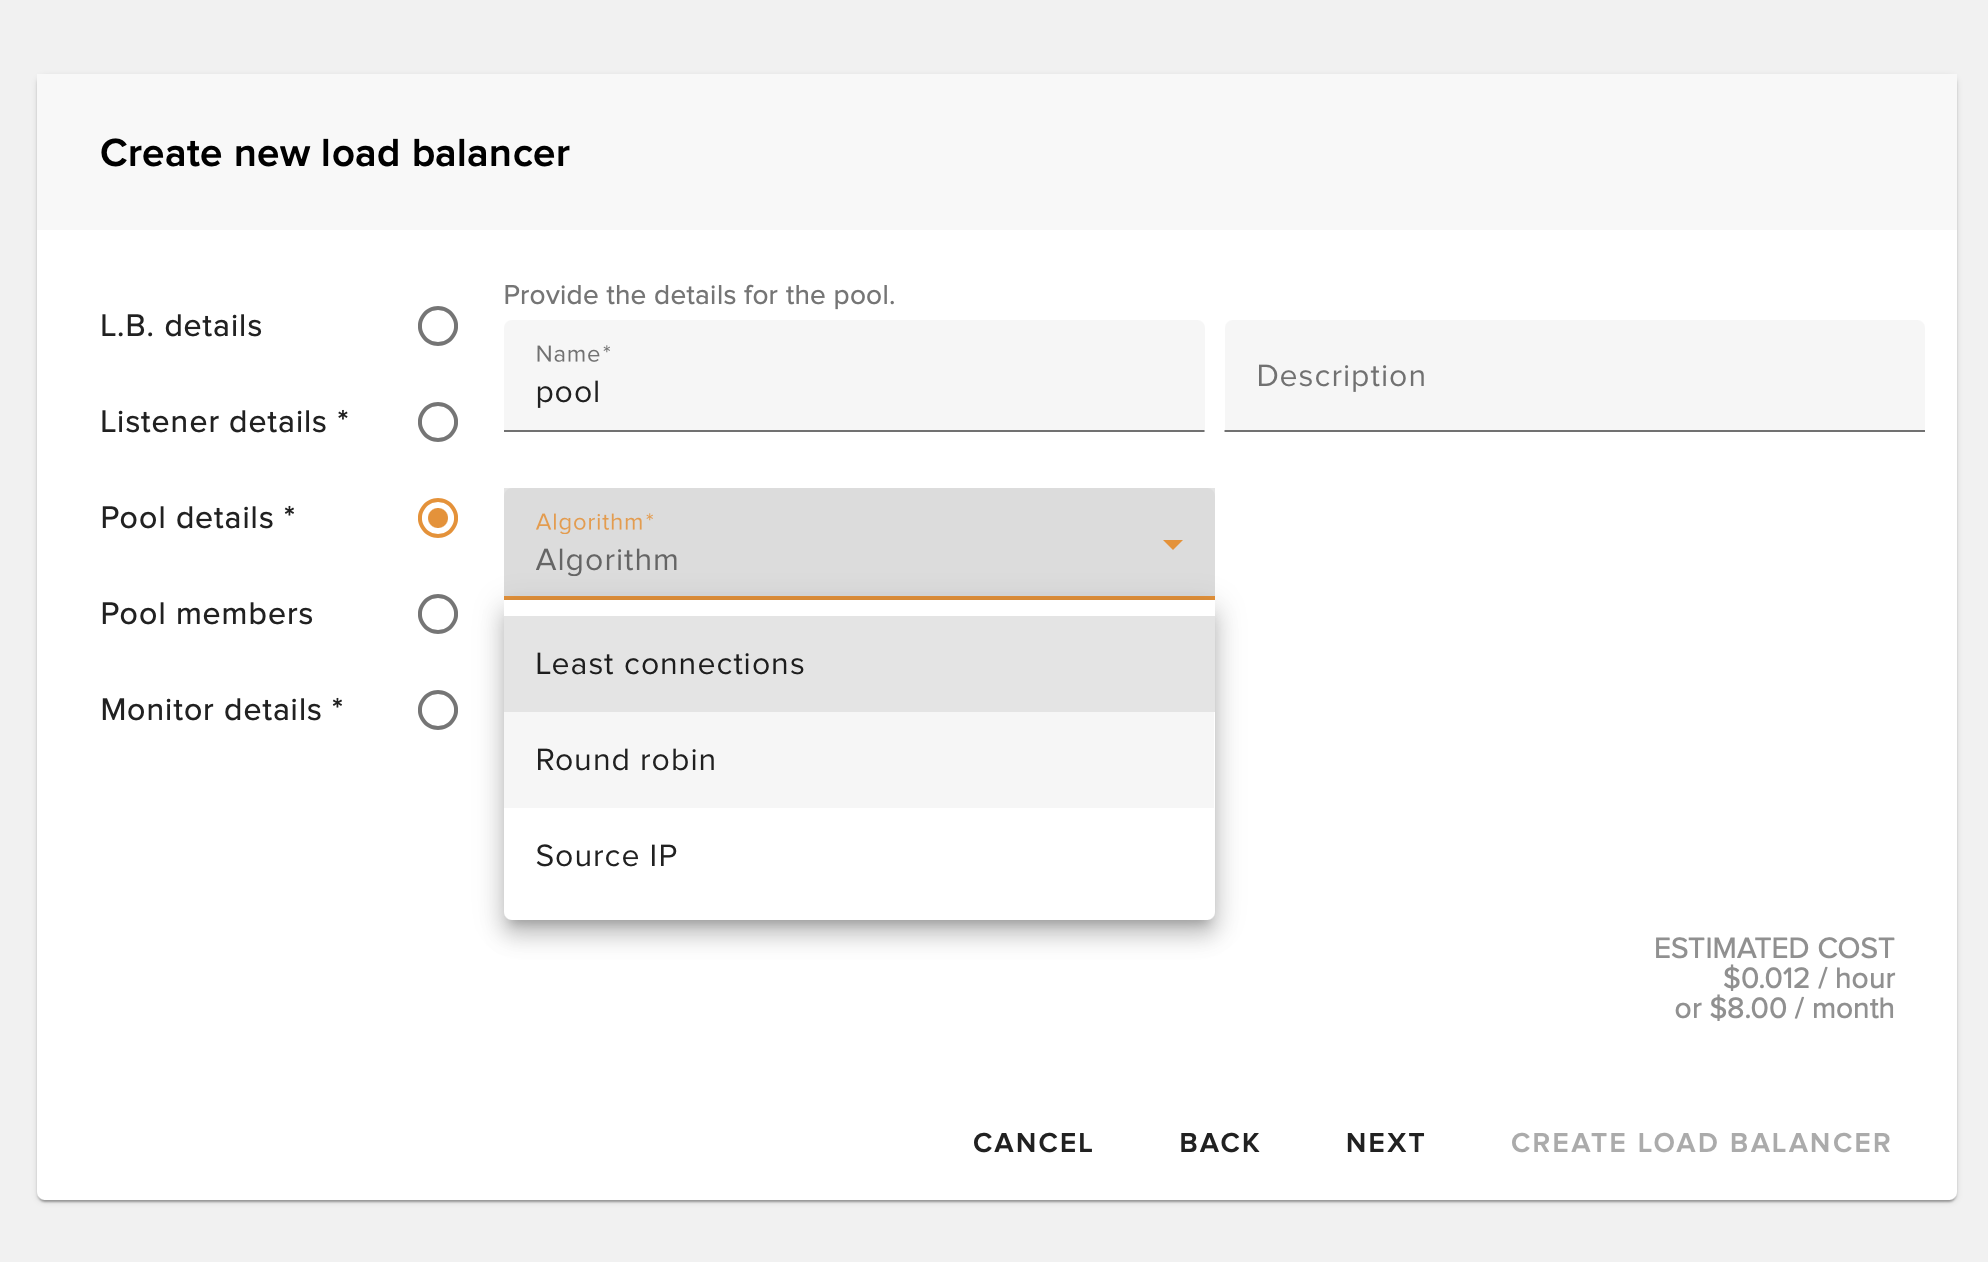
Round Robin
Distributes requests evenly across all members in sequence
Least Connections
Sends traffic to the member with the fewest active connections
Add Pool Members
Add members to the pool and set the port to which the load balancer will connect.
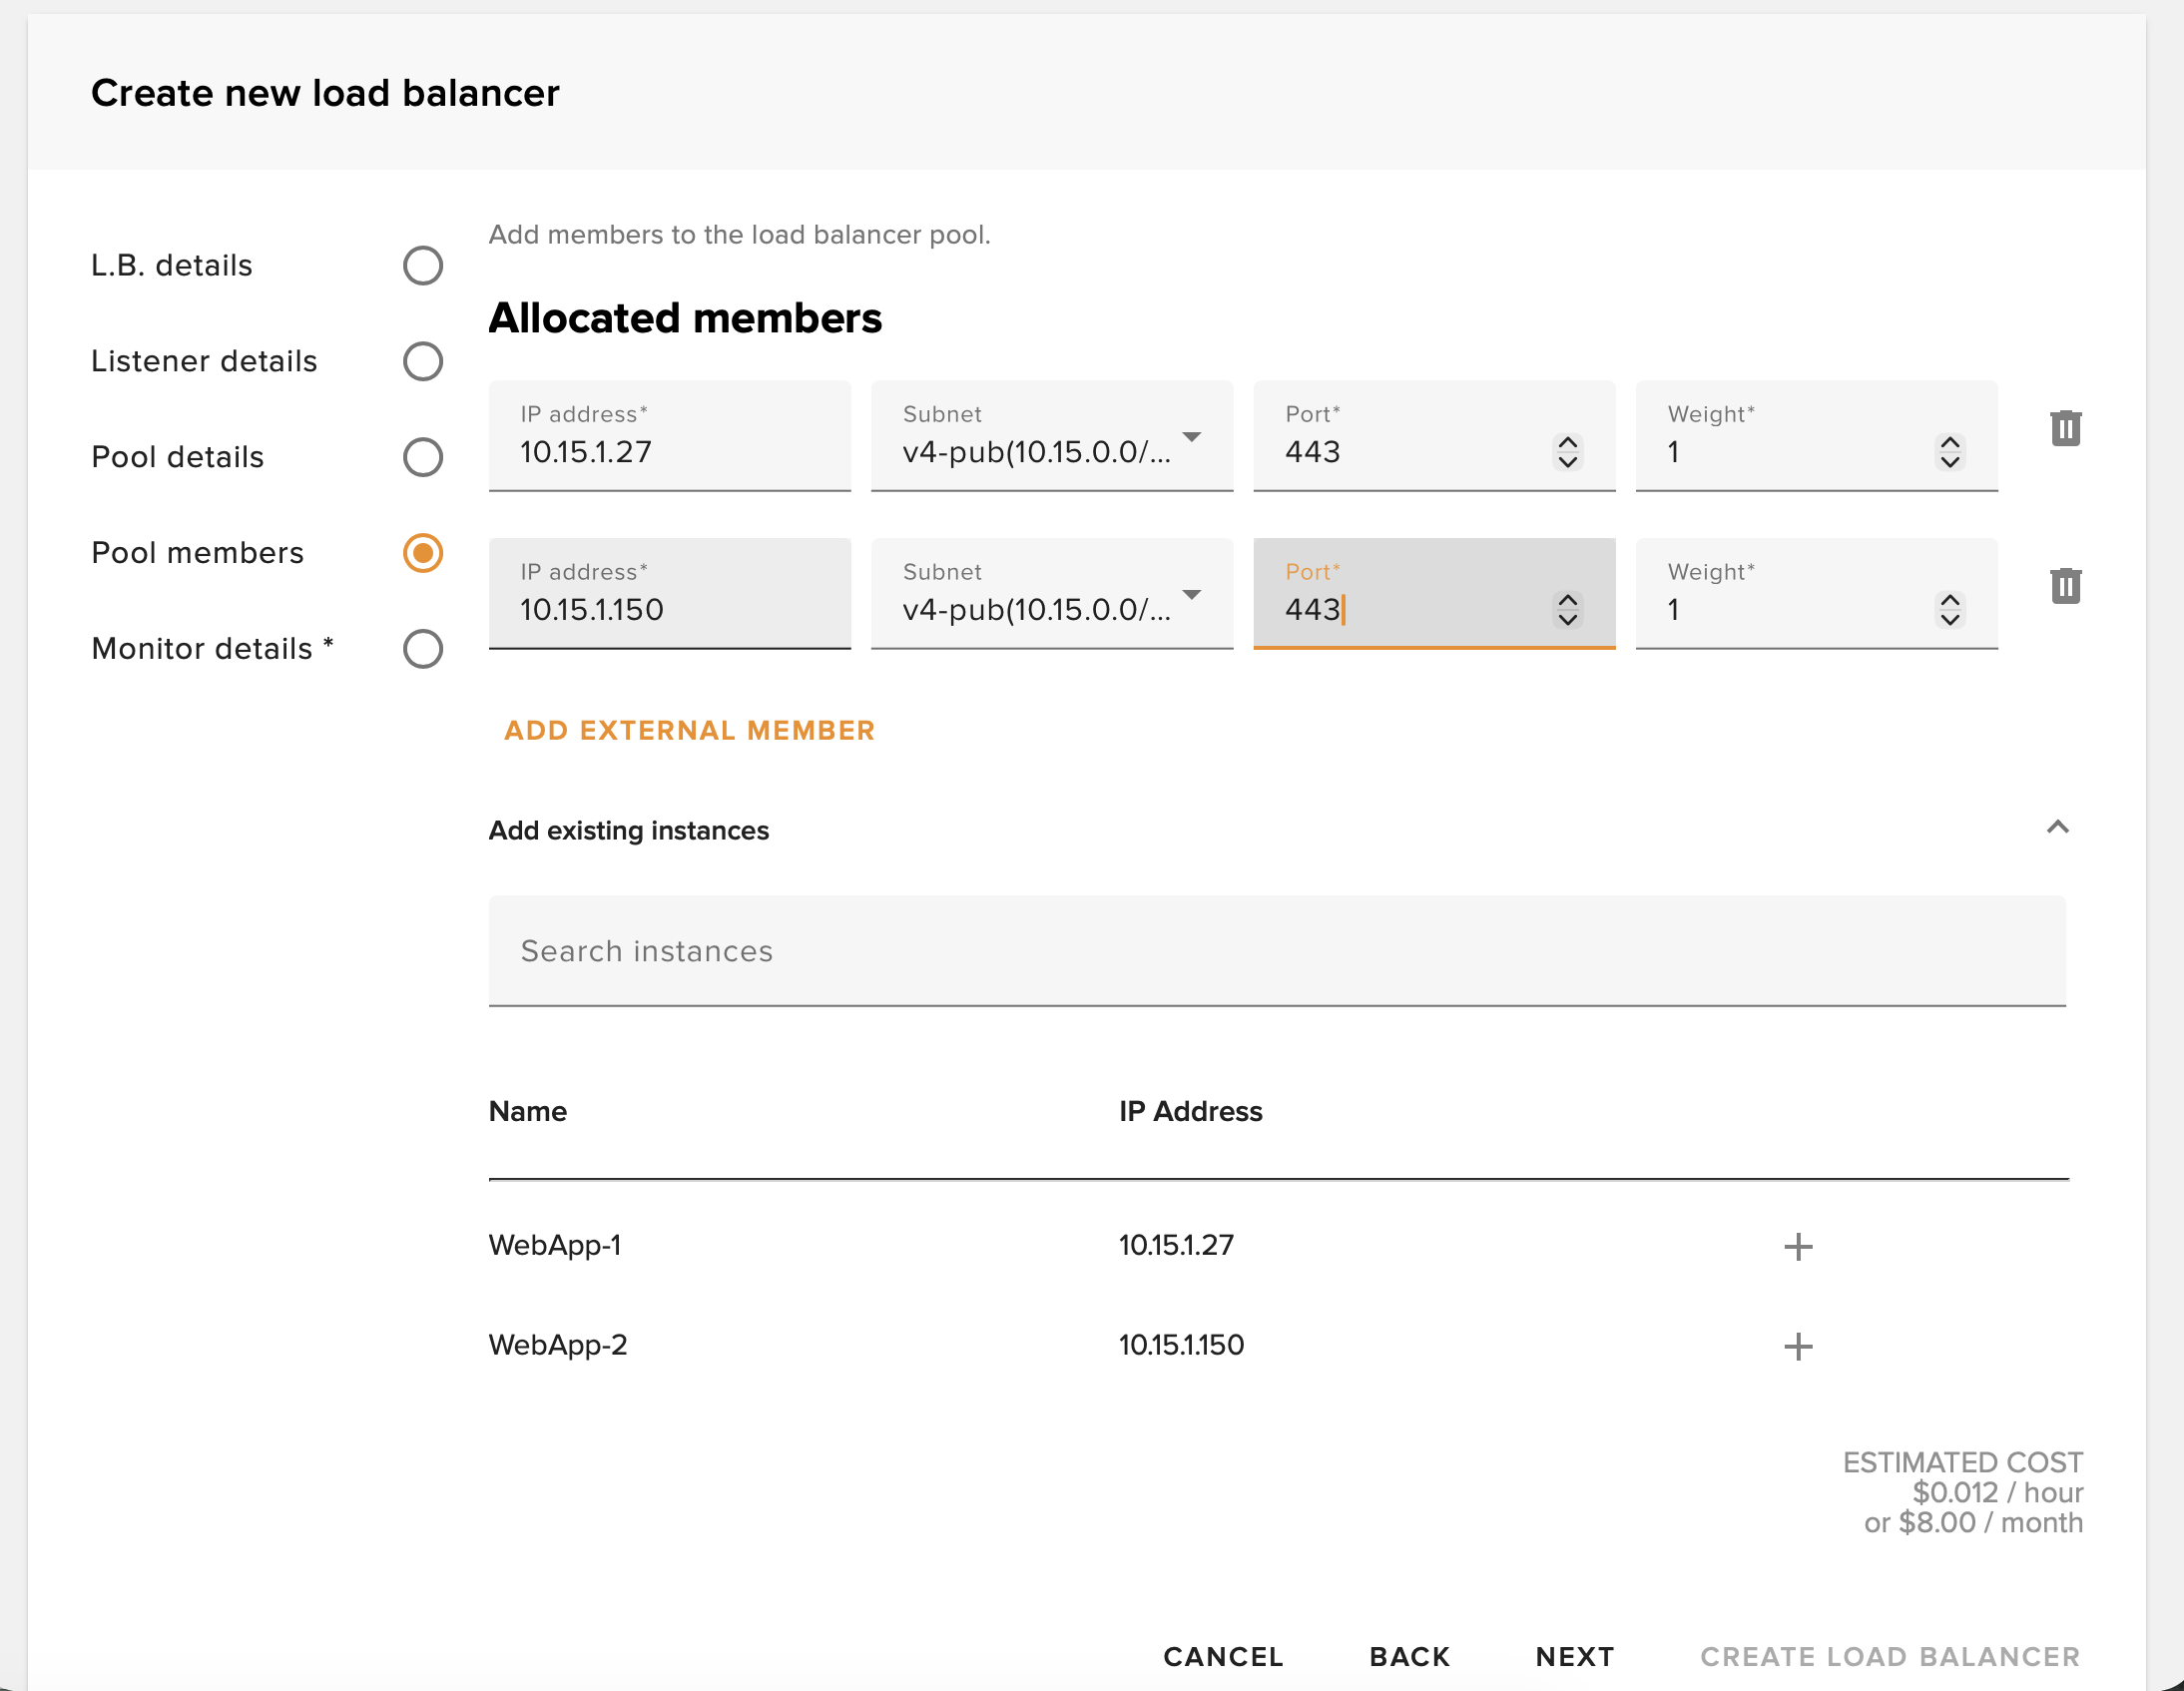
✅ Best Practice: Add at least 2 backend instances for redundancy. If one fails, traffic will automatically route to healthy members.
Set Up Health Monitor
Set up a health monitor to automatically check the status of your backend instances.
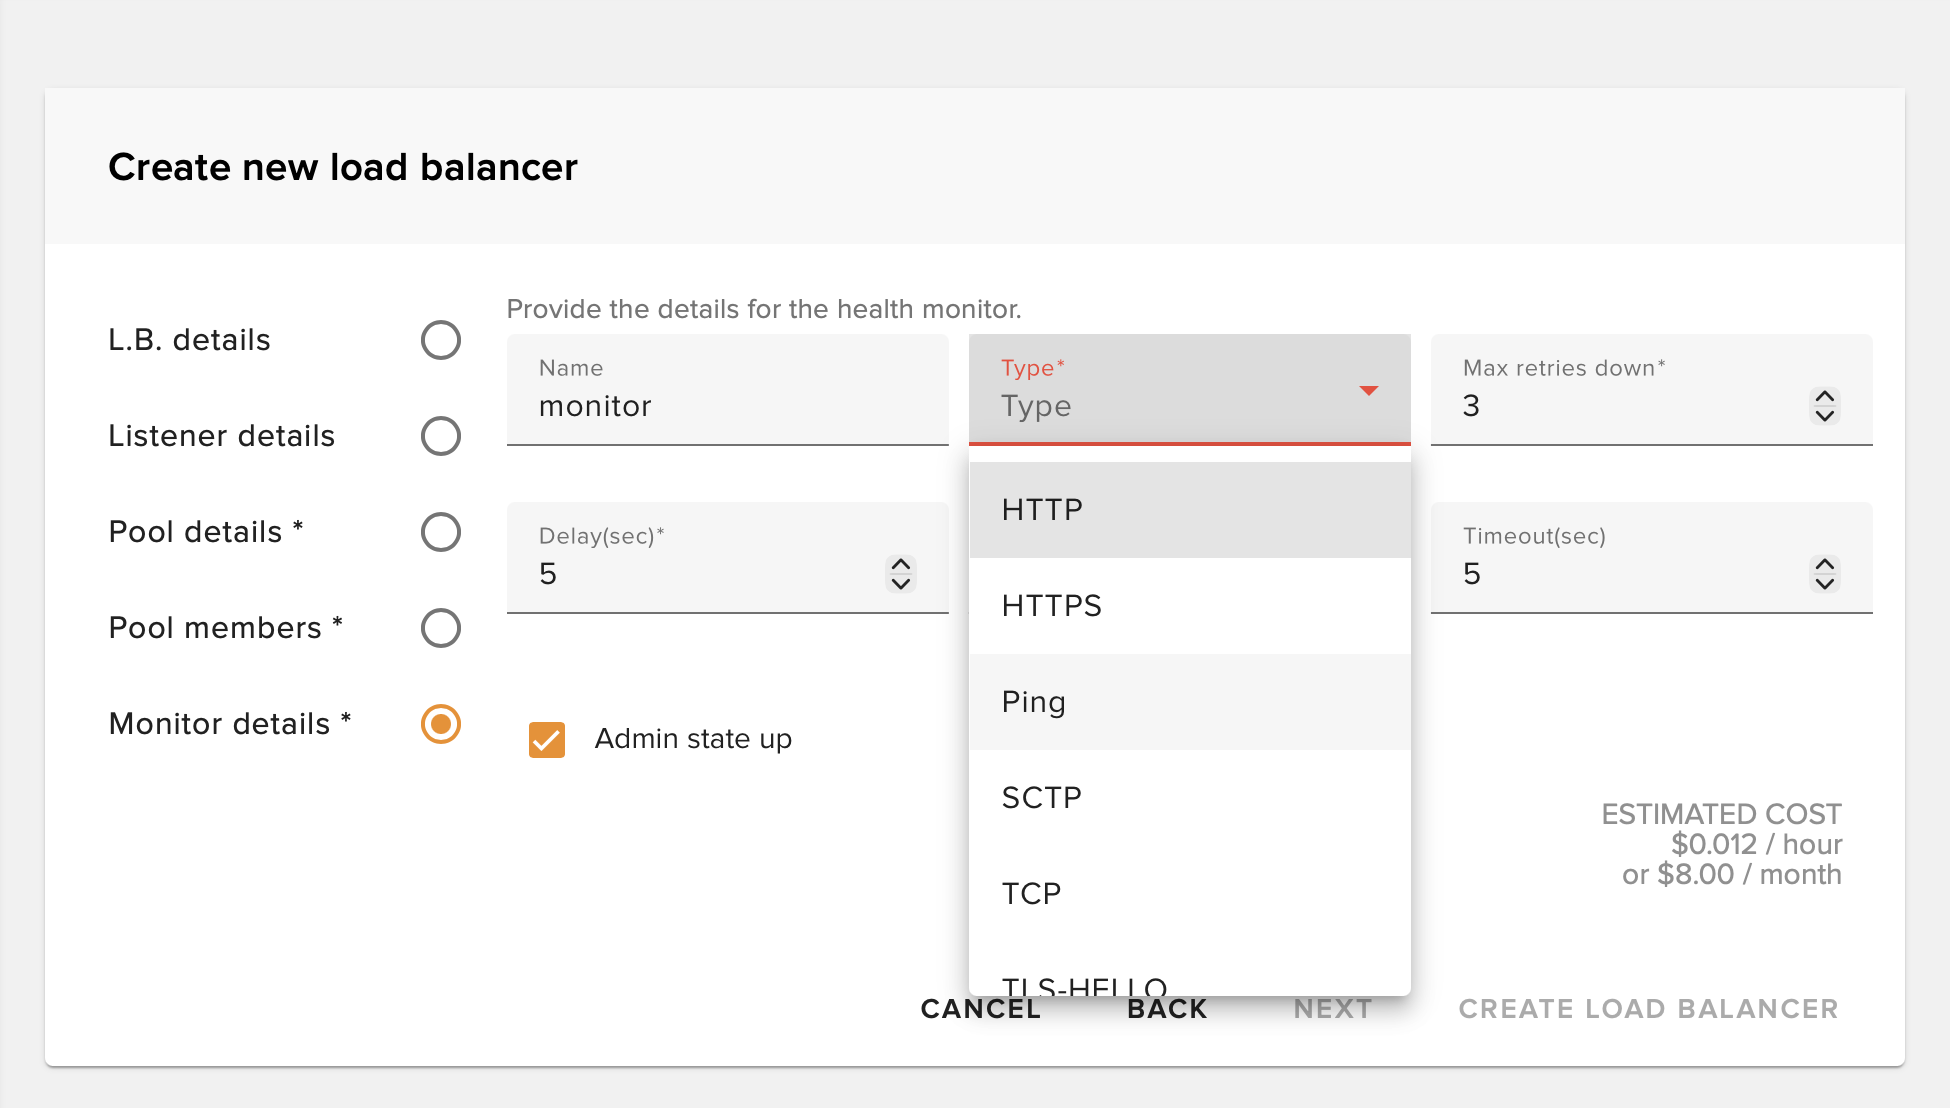
Health Monitor Settings
- • Type: HTTP, HTTPS, TCP, or PING
- • Delay: Time between health checks
- • Timeout: How long to wait for a response
- • Max Retries: Failed checks before marking unhealthy
Verify Configuration
If successful, your load balancer will be created with a public IP address.
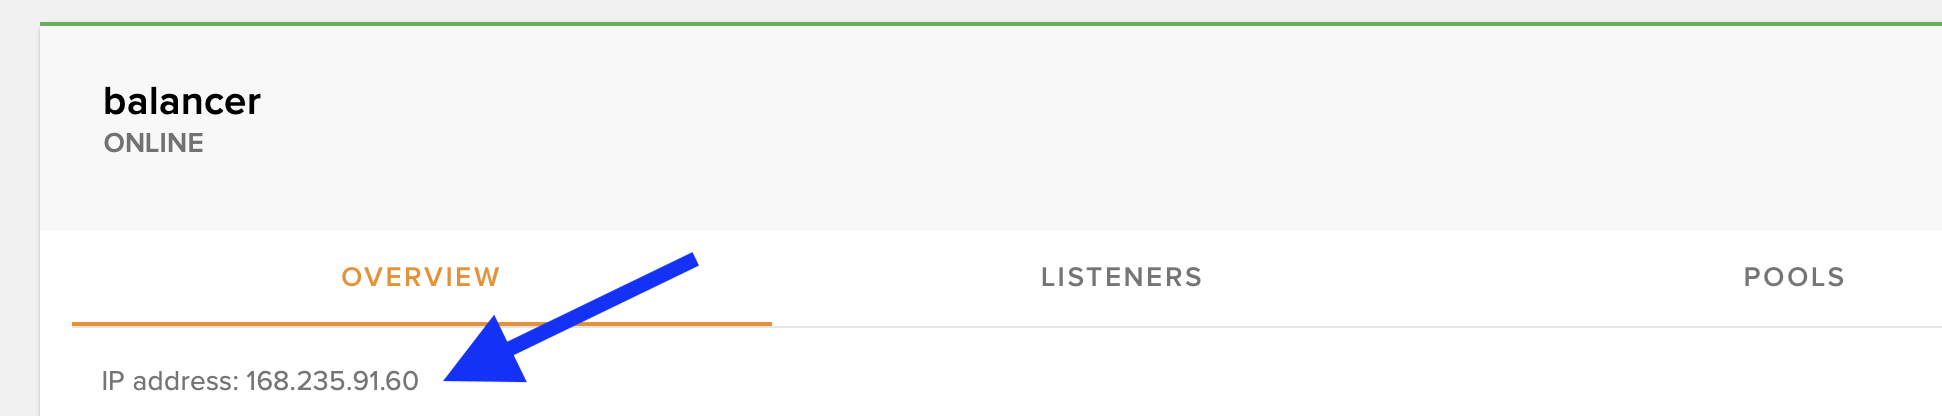
✅ Success! Your load balancer is now active. Point your domain's A record to the load balancer's public IP to start distributing traffic.
💡 If there are any errors, please open a support ticket.