Migrating Between Cloud Regions
Move your cloud instance from one region to another using snapshots and the OpenStack CLI
On This Page
Important Note for New Cloud Regions (LAX, NLX, etc.)
If your instance network configuration uses a directive like 'match' in Netplan (Ubuntu), or the IP address is configured static, this will need to be updated to DHCP with no MAC address matching before the migration, or else the new instance will not have network access.
These regions use Floating IP v4 addresses that are presented to your instance via NAT. Your instance will see a private IP in-instance (e.g. 10.0.0.10), but will be accessible via the public IP.
Migration Process Overview
The basic process for migrating an instance from one region to another involves creating a snapshot, downloading it via the OpenStack CLI, uploading it to the new region, and launching a new instance from it.
- Stop the instance
- Take a snapshot from the Cloud control panel
- Download the authentication file for the source region
- Use OpenStack CLI to download the image
- Download the authentication file for the destination region
- Use OpenStack CLI to upload the image to the new region
- Launch a new instance from the uploaded image
- For New Cloud regions: Create and assign a floating IP
Prerequisites
Before starting the migration, ensure you have:
- OpenStack CLI installed on your local machine
- Access to the RamNode Cloud control panel
- Sufficient disk space locally to store the image
- A stable internet connection for upload/download
If you do not have the OpenStack CLI tool installed, see our OpenStack SDK Tutorial.
1Stop the Instance
This step is not expressly required, but will help with data integrity. Stopping read/writes during the imaging process helps to eliminate possible data corruption from imaging a running system.
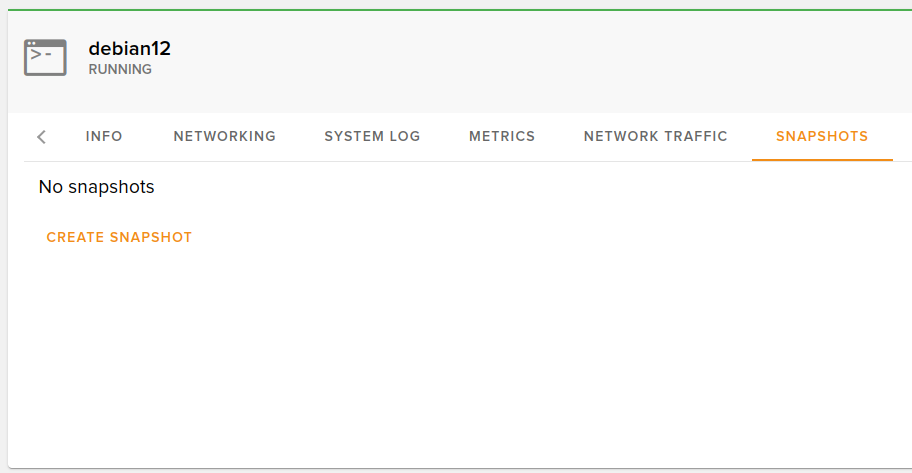
2Take a Snapshot
Go to the Cloud control panel at cloud.ramnode.com. Click on the Snapshot tab and click Create Snapshot. Name it something descriptive (e.g. your server name). Once this snapshot completes, continue to the next step.
3Download the Source Region Authentication File
Download the authentication file from the Cloud control panel for the region the image is located in (e.g. NL). This is an "openrc" file which contains the information to authenticate for the region selected.
Click the + symbol on the bottom right to create a new one if you don't already have one.
4Download the Image Using OpenStack CLI
A. Open a new terminal session
B. Source the authentication file:
source openrcC. Download the image:
openstack image save --file <file.qcow2> <image-uuid>Replace <file.qcow2> with an appropriate filename, and <image-uuid> with the UUID of the image to be downloaded.
Example:
openstack image save --file debian12.qcow2 0b6d3e37-864a-4783-9129-0b6a365cc740Note: There is no progress bar. When it completes, it will return to the command prompt.
5Download the Destination Region Authentication File
Go back to the Cloud control panel and re-download the openrc file, this time selecting the region you want to move the instance to (e.g. NLX).
6Upload the Image to the New Region
A. Open a new terminal session
B. Source the new authentication file:
source openrcC. Upload the image:
openstack image create --disk-format qcow2 --container-format bare --file <file.qcow2> <image-name>Replace <file.qcow2> with the filename you saved the image as, and <image-name> with the name you want for the image.
Example:
openstack image create --disk-format qcow2 --container-format bare --file debian12.qcow2 NLX-Server01Note: There is no notification or progress meter. It just returns to the command prompt when complete.
7Launch the New Instance
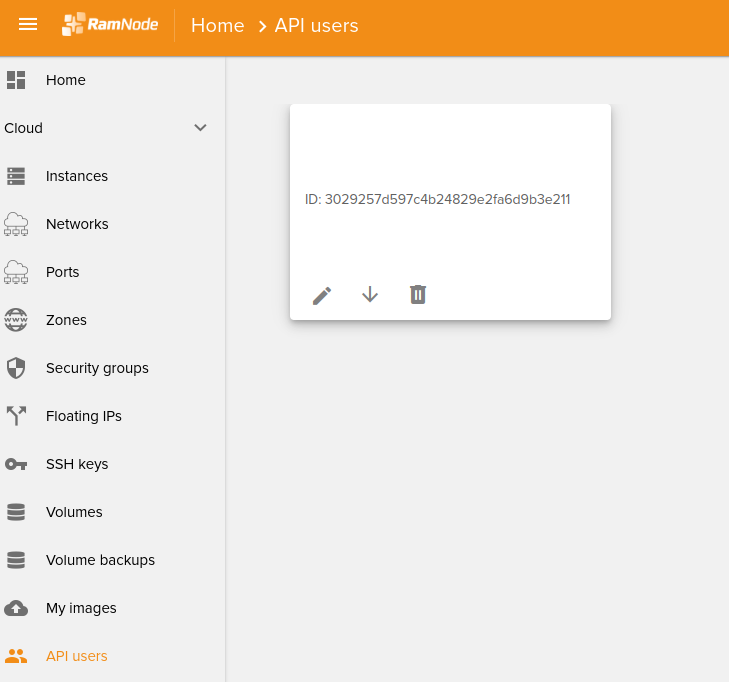
In the Cloud control panel, under My Images, you should see the new image you just uploaded. There is an arrow in the box for that image that says "launch image" if you hover over it.
- Click the launch arrow on your uploaded image
- Select a plan (one with at least the same disk space that your previous plan had)
- Click Create Instance
Note: No need to enter a password or attach an SSH key here - your previous user accounts will work.
8Assign a Floating IP (New Cloud Regions Only)
If you are launching an instance in one of our New Cloud regions (NLX, LAX, etc.), you will need to assign yourself a floating IP if you wish to have IPv4 connectivity.
See our guide: Creating a Floating IPv4 Address
Migration Complete
After the server completes, you should be able to log in as you previously did, though you will have a new IP address. Don't forget to update any DNS records pointing to the old IP address.